 I get tons of e-mails from RTS readers on a daily basis, so it’s fun to put the blog on cruise control sometimes and just answer a bunch of questions.
I’ve obviously written a ton about the deadlift before; look no further than my massive Deadlift blog post, or my post on Round Back Deadlifts.
But there’s always little things to tweak or refine. Plus, some people just want to know my approach or how I do things personally, so I’ll do my best to cover those things here.
(And, if you like this post, make sure to check out Dave Dellanave’s Off the Floor deadlift manual, which is on sale this week. More on this below).
Mike, what do you think about when setting up to deadlift?
I think, more times than not, lifting is determined by the set-up more than it is the actual performance of the lift.
Quite simply if you’re in a bad position to start with, your likelihood of completing any lift goes down drastically.
So when it comes down to it, here’s what I’m thinking about on my deadlift set-up from a joint-by-joint perspective.
The Feet
With the feet you can go two different routes:
- Keep the weight on the heels, or
- Focus on tripod foot.
When I was getting started I focused on shifting the weight back towards the heels. This allowed me to shift my center of gravity back and really load the glutes and hamstrings.
However, in recent years I’ve worked harder to maintain a tripod foot. Doing this has allowed (in my opinion) better feedback from the ground up. I can make finer adjustments to my body position if I’m getting feedback from my entire foot, versus just my heel.
The Knees
When it comes to the knees, I pull sumo so there isn’t too much to think about here. The biggest consideration when pulling sumo is to push the knees out so that you can maintain a good foot-knee-hip alignment.
If you pull conventional, this gets a bit more complicated. The biggest issue is when your knees get too far over the bar, and you end up having to maneuver the bar around your knee position.
What I like to do to remedy this is to set-up with my shins a few inches back from the bar, push my hips back as far as I can, and then bend my knees/dorsiflex slightly at the ankle to get that last bit of range of motion.
Doing this allows me to really load my back side, while keeping my knees out of the way.
The Hips
Other than the lower back, the hips are the most often discussed joint when it comes to deadlifting.
The big question, is how low should your hips be?
This is an age-old question, and I doubt I’m going to answer it here. But I’ll try and at least give you some good feedback.
If you’re just lifting for athletic performance, or to look good nekkid, I’d focus on getting your hips lower, your back nice and neutral, and using the legs on a stable spine to move the weight.
If you’re a powerlifter chasing big weights and PR’s, then you’ll probably opt to go with the hips a little bit higher. You’re also going to have a little bit of motion through the spine, especially when it comes to limit weights.
The best advice I can give here is this: Experiment a bunch, and figure out what works best for you. I’ve seen guys be successful starting with their hips very low and a ton of leg drive, and I’ve also seen guys hoist some ridiculous loads with a spine that’s as rounded as a pissed off cat.
Figure out what works best for you based on your needs and goals and go from there.
The Pelvis, Core & Lumbar Spine
I was going to break these up, but they’re so intimately related I decided to put them all together.
I’m going to put this out there up front – I think if you’re in a big anterior tilt and extremely arched through the lower back, you’re leaving performance (and pounds) on the platform.
The goal should be to get to a relatively neutral pelvis/lower back position. This will not only spare the spine and discs, but put your glutes and hamstrings in an optimal position to produce power both off the floor and at lockout.
A bit further down, I’ll explain exactly how I set myself up through the midsection on a deadlift.
The Thoracic Spine
There’s a lot of debate about the thoracic spine when it comes to deadlifting, but again, I think the answer really depends on why you’re deadlifting in the first place.
If your goal is just to look good or be more athletic, I’d look for a more neutral spinal alignment from top to bottom. Try to weld that thing together and resist motion, while your hips and thighs do the bulk of the work.
In contrast if you’re a powerlifter, the thoracic spine is probably going to flex/round over a bit, especially with big weights. Some of the strongest deadlifters in the world, the Fins, use this technique with regularity.
The key is to make sure you’re only moving the thoracic spine, versus hinging and whipping through the lumbar spine.
The Neck
With the neck, I really like to think about getting long on the back side, and tucking the chin slightly in the front.
Last but not least, a great cue I got from my friend Lil’ Stevie is to pull the head back. Often, your head will have a tendency to drift forward in front of you, so if you think about pulling the head back and getting long on the back side, you can get your neck into an ideal deadlifting position
The Shoulders
Last but not least, the shoulders (and really the lats) are critical to pulling big weights. I like to think about pulling the bar back and into my body, using the lats.
What do you think about when starting the lift?
Big Breath
I don’t care how strong your muscles are – the spine is largely stabilized via intra-abdominal and intra-thoracic pressure.
Watch a baby try and pick something up off the floor, and they do this naturally. They set their feet, take a big breath, and then pull like heck to try and get that item wherever they want it.
If a baby can figure this out, why can’t we?
Before you even think about picking something heavy up off the floor, take a big breath and hold it.
Keep the Lats Tight
This may be the single most important item to remember, in my opinion. I can’t tell you how many deadlifts I missed over the years simply because I didn’t understand how to keep my lats tight throughout.
When you lose tension through your lats, it sets off an evil cascade of events that looks something like this:
- You lose tension in the lats, so
- The bar drifts out in front of you, so
- The weight shifts to the balls of your feet, and
- You lose your lower back position, AND
- Your hips shoot up to try and compensate
Which leaves you in the worst possible position to finish a weight!
Keeping the lats tight, combined with pulling back, is a recipe for deadlifting success.
Pull Back
The natural tendency with a heavy weight is to get pulled forward. Obviously keeping the lats tight is a big component here, but I’d also recommend to think about pulling back.
Too often, people think that a deadlift is just standing up with a weight. And that’s probably fine when you’re just getting started, but as you get stronger and move more and more tonnage, you need to shift your mindset.
Pulling the bar back into your body versus simply pulling up allows you to preferential load the glutes and hamstrings. And again, if your goal is to move serious weight these are the muscles you should be focusing on.
Push Away from the Ground
This is another cue that works really well. Don’t just think about picking the bar up, but instead think of pushing your entire body away from the ground.
Not only does this help with body position, but it seems to help with intermuscular coordination and timing as well.
Lead with the Chest
Last but not least, this is one of my absolute favorite cues, especially with conventional deadlifters.
When deadlifting conventional, the tendency is to get rounded over and to finish the weight with your back. If you get too rounded over, you simply cannot finish the weight with your hips, no matter how hard you try.
What I like to cue is to think about “pushing away from the floor” while simultaneously “leading with the chest.” This will keep your torso in a better position off the floor, which will improve the ability to lockout big weights.
How do you brace/use a belt for the deadlift?
Let’s talk about how I think you should brace first, and then I’ll explain why that fits seamlessly into using a belt.
 If you’re in a big anterior tilt/lumbar lordosis, this does a couple of bad things:
- Crushes the back side of your disc/spine,
- Only allows you to breathe/push air towards your belly, and
- Lengthens the glutes and hamstrings, putting them in a disadvantageous position.
None of this sounds cool, right? So here’s how we have to fix it.
The first tip sounds simple, but it’s not easy. You need to wage a full scale assault on reducing your degree of anterior tilt/lumbar lordosis. This goes a lot further than just some hip flexor stretches and anterior core work, so I’ll have to cover that in depth at another point in time.
However, I’m not going to leave you hanging – the following set of cues will make a big difference immediately. Let’s just do it in bullet point to make it easier to follow.
- Stand over the bar like you would before you deadlift.
- Exhale slightly and feel your ribs come down. You should feel your abs turn on slightly, and your lower back relax a bit.
- Now while you’re keeping your ribs down, take in that full, big breath that we talked about before. Do NOT allow the back to arch excessively!
- Hold that breath/lower back position, grip the bar, and rip it!
In my opinion, this is the ideal way to set-up for a deadlift. You optimize pelvis and lumbar spine position, get a breath into your entire core (not just the front), and optimize position of the glutes and hamstrings.
Pretty sweet, eh?
Now with a belt, in reality, nothing should change. And in some ways, it’s actually easier to feel if you’re doing it right because the belt is giving you feedback as to where you have the most stability.
If you have a belt, you can try it both ways. Let’s do it wrong first.
Put the belt on, arch like crazy and let your ribs pop up, and then take a breath. Get a feel for where the air and pressure are going.
Chances are the air/pressure are only noticeable in the front.
Now try it the opposite way.
Exhale slightly.
Bring the ribs down.
And take a deep breath in.
It may not be perfect at first, but as you get better and better you should be able to push air into the front, sides, and even the back.
The analogy I’ve used for years is that if are holding the top and bottom of a balloon between your hands and you press down, the balloon expands outwards.
That’s what we should be doing to get a solid brace through our core, with or without a belt.
Summary and Shameless Product Plug
So there you have it – a step-by-step breakdown of how I approach the set-up and performance of the deadlift.
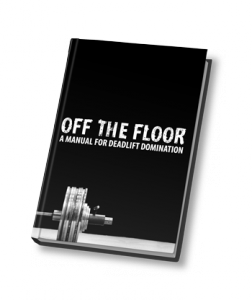 If you’re interested in taking your own deadlift to the next level, I’d also highly recommend Dave Dellanave’s Off the Floor deadlift manual.
Dave has some really cool ideas when it comes to training the deadlift, including how to incorporate more frequency into your training, as well as using autoregulation to get more out of each and every deadlift session.
Stay strong
MR
P.S. – Dave’s Off the Floor deadlift manual is on sale through Saturday at midnight, so if you’re interested in picking up a copy do so ASAP before the sale ends!